When a new tattoo is received, a significant commitment to proper care is undertaken. The beautiful artwork permanently etched into the skin represents more than just a design; it is also a wound that must be diligently cared for to ensure optimal healing and vibrancy. Understanding the comprehensive
tattoo healing process
day by day is critical for anyone embarking on this journey, especially during the initial stages. The video above provides a concise visual timeline, illustrating the typical progression during the first 10 days; this article will delve deeper into each stage, offering essential insights and practical advice for meticuloustattoo aftercare
.The skin’s ability to repair itself is truly remarkable, but assistance is often required to prevent complications and preserve the integrity of the ink. A well-healed tattoo maintains its sharpness, color, and overall aesthetic appeal for years to come. Conversely, improper aftercare can lead to issues such as infection, significant ink loss, scarring, and a dull appearance. Therefore, careful attention to the nuances of the
tattoo healing process
is always recommended for a successful outcome.Understanding the Initial Tattoo Healing Process: Days 1-3
The beginning of the
tattoo healing process
is arguably the most critical period, where the fresh wound is most vulnerable. Immediate aftercare steps are designed to protect the tattoo from bacteria and facilitate the initial stages of recovery. It is during these first few days that the foundation for proper healing is laid, making diligent adherence to your artist’s instructions paramount for a healthy outcome.Day 1: The Fresh Tattoo Experience
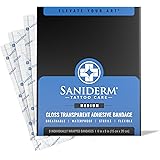
Upon completion, your new tattoo is essentially an open wound, and it will be covered by your artist, typically with a specialized bandage such as Saniderm or Tegaderm, or simply with plastic cling wrap. This initial covering is intended to protect the raw skin from airborne bacteria and initial fluid leakage. It is often advised that this covering be left on for a specific period, generally between 2-24 hours depending on the type of bandage used and your artist’s recommendation. The skin beneath the bandage may appear red and slightly swollen, which is a normal inflammatory response to the tattooing procedure.
Day 2: Navigating the “Ink Sack” and First Wash
As highlighted in the video, Day 2 may present what is often referred to as an “ink sack.” This phenomenon is characterized by the accumulation of plasma, lymphatic fluid, and excess ink beneath the protective bandage. While its appearance can be alarming to the uninitiated, it is a completely normal and safe part of the
tattoo healing process
. This fluid serves to protect the tattoo and prevent a dry scab from forming too quickly, but it is typically removed when the initial bandage comes off.After the bandage is gently removed, usually on Day 2, the first careful wash of the tattoo is performed. It is critical that this is done using lukewarm water and a mild, fragrance-free antibacterial soap. The area should be gently lathered with clean hands, not a washcloth or sponge, to remove any remaining blood, plasma, or excess ink. Rinsing thoroughly and then patting the tattoo dry with a clean paper towel, rather than a fabric towel, is recommended to minimize bacterial transfer. Air drying for a few minutes before applying a very thin layer of artist-recommended aftercare ointment is often suggested.
Day 3: Beginning of Dryness and Tightness
By Day 3, the initial swelling usually starts to subside, and the tattoo may begin to feel noticeably drier and tighter. This sensation indicates that the skin is commencing its regenerative process. It is during this phase that the application of a small amount of approved, fragrance-free moisturizer becomes crucial. This helps to keep the skin hydrated, promoting flexibility and reducing the discomfort associated with dryness. Over-moisturizing, however, should be avoided, as it can suffocate the tattoo and impede proper healing.
Mid-Stage Tattoo Healing: Days 4-7
As the initial tenderness fades, the skin transitions into a more active phase of healing, which often includes dryness and the formation of protective scabs. This part of the
tattoo healing process
is where patience becomes particularly important, as the temptation to pick or scratch can be strong. Maintaining a consistenttattoo aftercare
routine remains vital to prevent damage to the healing skin.Day 4: Increasing Dryness and Potential Itchiness
The dryness experienced on Day 3 typically intensifies by Day 4. The tattooed area may appear slightly duller as the top layer of skin begins to prepare for exfoliation. Itchiness is a common complaint at this stage, indicating that the new skin cells are working beneath the surface. It is paramount that scratching is avoided at all costs, as this can dislodge scabs prematurely, pull out ink, and introduce bacteria, potentially leading to infection or patchy healing. Gentle patting around the area can sometimes alleviate the itch, but direct scratching should always be prevented.
Day 5: Scab Formulation and Skin Tightness
On Day 5, the formation of scabs becomes more evident. These are not typically thick, raised scabs like those from a deep wound, but rather thin, flaky layers that cover the tattoo. The skin will continue to feel tight, and the dryness persists. Proper moisturizing, applied very thinly and gently, helps to keep these scabs soft and supple, preventing them from cracking or falling off prematurely. It is important that the skin is allowed to breathe, so heavy occlusive creams are generally not recommended.
Day 6 & 7: Scabs Begin to Peel Off
The period between Day 6 and Day 7 is often marked by the visible peeling of the scabs. This is a natural and expected part of the
tattoo healing process
, as the old, damaged epidermal layers are shed to reveal the new skin underneath. The peeling may resemble a sunburn, with flakes of skin coming away from the tattoo. Again, it is crucial that these flakes are allowed to detach naturally; never pull or pick at them. Doing so can remove ink or damage the underlying new skin, leading to permanent imperfections in the tattoo. Continue with regular, gentle washing and moisturizing to support this natural exfoliation.Later Stages of Healing and Long-Term Care: Days 8-10 and Beyond
As the visible scabbing and peeling subside, the tattoo begins to take on its final appearance, though the deeper layers of skin continue to heal for several weeks or even months. Understanding what to expect during these later stages of the
tattoo healing process
helps ensure that the tattoo fully settles and maintains its quality.Day 8: New Skin Formulates, Dead Skin Peels Off
By Day 8, a significant amount of the dead skin should have peeled away, revealing a new layer of skin underneath. This new skin may appear somewhat shiny, delicate, and slightly paler than the surrounding skin. The tattoo itself might look a little dull or hazy at this point, which is completely normal. This is due to the fresh, thin layer of skin covering the ink. Continued gentle moisturizing is essential to protect this new skin and support its maturation.
Day 9 & 10: New Skin Settles, Color Darkens
As Day 9 and 10 arrive, the new skin continues to form and settle. The dullness or haziness of the tattoo typically begins to diminish, and the colors will start to look more vibrant and defined. The video mentions that the tattoo will “just get better and darker in the next 15 days,” which highlights that while the surface healing is well underway, the ink is still settling into the deeper layers of the dermis. This maturation period is where the tattoo truly integrates into the skin, achieving its intended brightness and saturation. Consistent hydration and protection from sun exposure are particularly important during this extended settling phase.
Beyond Day 10: Long-Term Tattoo Aftercare Considerations
While the most intensive part of the
tattoo healing process
is generally considered to be the first two weeks, a tattoo is not fully healed internally for several months. During this time, the skin continues to strengthen and normalize. It is vital to continue moisturizing the tattoo regularly, especially in dry environments, and to always protect it from direct sunlight using broad-spectrum SPF 30+ sunscreen. Prolonged exposure to UV rays can fade tattoo ink over time, even in fully healed tattoos. Avoiding harsh chemicals, abrasive scrubbing, and excessive friction on the tattooed area will also contribute to its longevity and appearance. The journey of a tattoo’s life extends far beyond the initial healing, requiring ongoing care to maintain its beauty.Your Healing Masterpiece: Q&A on Tattoo Aftercare
What is the tattoo healing process?
The tattoo healing process is the journey your skin takes to recover after getting a tattoo, turning it from an open wound into a vibrant, permanent piece of art. It involves several stages where the skin repairs itself and the ink settles.
Why is proper aftercare important for a new tattoo?
Proper aftercare is crucial to prevent infections, significant ink loss, or scarring, ensuring your tattoo heals beautifully with sharp lines and vibrant colors. Neglecting aftercare can lead to a dull appearance and permanent damage.
What should I expect immediately after getting a new tattoo?
Immediately after getting a new tattoo, it will be covered with a special bandage or cling wrap to protect it from bacteria. The tattooed skin may appear red and slightly swollen, which is a normal inflammatory response.
What is an “ink sack” and is it normal during healing?
An “ink sack” refers to the normal accumulation of plasma, lymphatic fluid, and excess ink beneath the initial protective bandage, often seen around Day 2. It’s a completely normal part of the healing process and helps protect the tattoo.
How should I clean and moisturize my new tattoo?
After removing the initial bandage, gently wash your tattoo with lukewarm water and mild, fragrance-free antibacterial soap using clean hands. Pat it dry with a clean paper towel, then apply a very thin layer of artist-recommended, fragrance-free moisturizer.