Imagine the buzz of the machine in your hand, the canvas stretched taut before you, and the anticipation of laying down your first perfect line. For any aspiring artist, mastering the foundational techniques of tattooing is both exhilarating and, let’s be honest, a little daunting. The video above offers a fantastic practical walkthrough for new tattoo artists, guiding you through crucial steps for flawless line work and effective shading. We’re diving deeper into these tattoo basics, providing essential context and expanding on the techniques that separate novice attempts from professional artistry.
Getting these fundamentals right is critical. Your client’s experience and the longevity of your artwork depend on it. Let’s break down how to refine your approach, ensuring every tattoo you create is a testament to precision and skill.
Mastering Tattoo Line Work: Precision and Stencil Preservation
The first step in any tattoo is often the most defining: the line work. As you saw in the video, starting from the bottom corner and working your way upwards is not just a preference; it’s a strategic move that protects your stencil. Imagine if you constantly wiped over the fresh, liquid stencil ink; you’d quickly lose your guide, turning a precise design into a freehand challenge.
This technique is particularly vital with water-based stencil solutions, which take time to fully cure and become resistant to smudging. Giving the stencil a chance to set while working above it ensures your blueprint remains clear throughout the entire lining process.
The Role of Tattoo Lubricant in Clean Lines
Applying a thin layer of tattoo lubricant, like the Vaseline mentioned for fake skins, serves multiple purposes. On practice skins, it helps the needle glide smoothly, reducing friction and mimicking the subtle resistance of real skin. More importantly, it acts as a barrier, collecting excess ink and preventing it from spreading and obscuring your vision.
When working on real skin, artists often switch to specialized tattoo salves or ointments designed to soothe, protect, and provide that crucial lubricated surface. These professional-grade lubricants minimize irritation, aid in stencil longevity, and facilitate a cleaner workspace, allowing you to clearly see every stroke.
Dabbing Versus Wiping: A Key Distinction for Lining
The video makes a crucial point: dabbing, not wiping, is essential when executing line work. Wiping with a paper towel can easily smear your stencil, especially during the initial passes. Dabbing gently lifts away excess ink and any small amounts of blood or plasma without disturbing the underlying design.
This careful approach maintains the integrity of your stencil, keeping your lines crisp and your overall design accurate. It’s a small detail, but it dramatically impacts the final outcome and your ability to work efficiently.
Optimal Machine Settings for Tattoo Lines
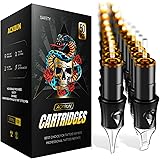
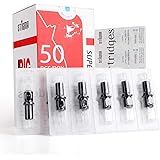
For crisp, solid lines, the video suggests using a 9 Round Liner (9RL) needle at 8 volts. This is an excellent starting point for many artists and designs. A 9RL consists of nine individual needles grouped tightly together, forming a perfect point for drawing consistent, medium-thick lines.
The 8-volt setting for a rotary machine (assuming a common rotary setup, as indicated by the direct voltage mention) provides sufficient speed and power for the needle to penetrate the skin efficiently and deposit ink evenly. However, remember that machine type, needle cartridge tension, ink viscosity, and individual skin characteristics can influence the ideal voltage. Always test your settings on practice skin first to achieve optimal depth and saturation for your chosen line weight.
Perfecting Tattoo Shading Techniques for Smooth Gradients
Once your line work is flawlessly executed, it’s time to bring depth and dimension to your design through shading. Shading is where the art truly comes alive, transitioning from a flat outline to a vibrant, multi-dimensional image.
The Right Tools for Smooth Shading
For shading, the video recommends a 13 Curved Mag (13CM) needle at 6.5 volts. A curved mag, unlike a flat mag, has its needles arranged in a gentle arc, which allows for softer edges and more even ink distribution across a larger area. This curvature helps prevent harsh lines and “tracks” often seen with traditional flat mags, making it ideal for creating smooth gradients and color packing.
The slightly lower voltage of 6.5 volts compared to lining is often preferred for shading. This reduced speed gives you more control over ink saturation, allowing for gradual build-up of tone without oversaturating the skin too quickly. Slower machine speed, combined with precise hand movements, creates the soft transitions that define good shading.
Mastering Whip Shading and Crosshatching
Whip shading, as demonstrated, involves pushing away from yourself and gradually tilting the machine upwards as you pull out of the skin. This technique creates a ‘feathering’ effect, laying down a denser concentration of ink at the start of the stroke and tapering off towards the end. It’s perfect for creating soft fades and transitions, mimicking traditional art techniques.
To achieve even smoother blends and richer saturation, incorporating crosshatching is incredibly effective. Crosshatching involves layering whip shades in different directions. Imagine applying a layer of whip shading horizontally, then another layer vertically, and perhaps even diagonally. This overlapping creates a dense, uniform color application and seamless gradients, eliminating any streaking or patchiness.
Adjusting your hand speed is paramount in both techniques. Slower hand speeds deposit more ink per pass, leading to darker, more saturated areas. Faster hand speeds result in lighter, more delicate washes. Learning to vary your speed and pressure instinctively is a skill that develops with practice and keen observation.
The Importance of Green Soap in Shading Cleanup
When shading, you’ll be wiping away significantly more excess ink, particularly if you’re packing in solid color. This is where a paper towel dampened with green soap solution becomes your best friend. Green soap is an industry standard for its gentle, antibacterial properties, making it safe for cleaning the skin during a tattoo session. It effectively breaks down ink and blood without irritating the skin, which is crucial during longer sessions where the skin can become quite sensitive.
Always dilute your green soap according to the manufacturer’s instructions. A common ratio is 1 part green soap to 9 parts distilled water. This ensures effective cleaning without drying out or causing excessive redness to the skin, maintaining a clear and hygienic workspace.
Beyond the Basics: Achieving Flawless Saturation and Consistent Results
The video emphasizes the importance of flawless line work, ensuring no lines are “undersaturated or incomplete.” This applies equally to shading. Undersaturation in lines means the ink hasn’t been properly deposited into the dermis, resulting in a faded or patchy appearance that will look weak as it heals. In shading, it leads to uneven tones and a lack of depth.
Consistent saturation comes from a combination of factors: correct needle depth, appropriate voltage, and a steady hand speed. You want to ensure the needle enters the dermis (the second layer of skin), which is where the ink will remain permanently. Too shallow, and the ink fades quickly; too deep, and you risk blowouts or excessive scarring.
The Practice Canvas: From Fake Skin to Real Mastery
While the video focuses on techniques using fake skins, the ultimate goal for new tattoo artists is to transfer these skills to real skin. Fake skins are invaluable for developing muscle memory, understanding machine dynamics, and practicing various needle groupings and voltage settings without the pressure of working on a client.
However, real skin offers different challenges: elasticity, texture, and the unique way it reacts to ink. Continuously practicing on a variety of mediums, observing how different inks settle, and learning to adjust your technique accordingly will build your confidence and expertise. Always remember that the journey of mastering tattoo basics is an ongoing process of learning, practicing, and refining your craft.
Etching Your Queries: A Q&A for Aspiring Tattoo Artists
What is a basic tip for starting tattoo line work to protect the stencil?
To protect your stencil, start your line work from the bottom corner and move upwards. This prevents you from wiping over and smudging the fresh stencil while you work.
Why is it important to use tattoo lubricant?
Tattoo lubricant helps the needle glide smoothly, reducing friction on the skin. It also collects excess ink, keeping your working area clear so you can see your design better.
Should I dab or wipe when cleaning during line work?
When doing line work, you should dab gently with a paper towel, rather than wiping. Dabbing lifts away excess ink without smearing your stencil, helping to maintain crisp lines.
What are suggested starting settings for tattoo line work and shading?
For crisp lines, a 9 Round Liner (9RL) needle at 8 volts is a good starting point. For smooth shading, try a 13 Curved Mag (13CM) needle at 6.5 volts.