Mastering Your Tattoo Healing Journey: A Low-Maintenance Approach
For anyone who has experienced the excitement of a new tattoo, the subsequent healing process can often feel like a tedious challenge. You might have tried numerous methods, some requiring constant attention, others leaving your fresh artwork looking less than perfect. The video above offers a fresh perspective, presenting a streamlined, effective strategy for healing tattoos that minimizes hassle while maximizing results. Let’s dive deeper into this game-changing tattoo healing process, ensuring your new ink looks its absolute best.
Imagine a world where your tattoo heals flawlessly with minimal effort. This guide expands on the video’s insights, providing a detailed roadmap to achieve just that. We’ll cover everything from the crucial first steps to the innovative use of second skin, transforming your aftercare routine into a stress-free experience.
The Critical First Day: Setting the Stage for Optimal Tattoo Healing
The moment you leave the tattoo shop, your new tattoo care begins. Your artist typically wraps the tattoo in a protective layer, often a clear plastic film. This initial wrapping serves one primary purpose: to shield your fresh wound from airborne bacteria and environmental contaminants as you travel home.
Upon arriving home, the first vital step is to remove this initial wrap promptly. Allowing your skin to breathe after the trauma of the tattooing process is crucial. The tattooed area has endured significant stress, and a brief period of exposure helps reduce redness and irritation. Aim for about 30 minutes of air exposure to let your skin begin its recovery journey before the next steps.
Gentle Tattoo Cleaning: The First Wash
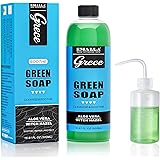
With your tattoo now breathing freely, it’s time for its first proper wash. Begin by thoroughly washing your hands with antibacterial soap; cleanliness is paramount to prevent any bacteria from transferring to your delicate new tattoo. Trust us, even seemingly clean hands can harbor unwanted microorganisms.
Next, gently wet your tattoo with lukewarm water. Avoid hot water, as it can be uncomfortable and potentially open pores too much, while cold water should be saved for later in this step. Apply a small amount of unscented antibacterial soap to your clean hands, lathering it up, then gently massage your tattoo in circular motions. This action effectively removes any lingering blood, plasma, or excess ink.
After a thorough cleaning, rinse your tattoo with cold water. This isn’t just to remove soap; cold water constricts blood vessels and helps to soothe the irritated skin. Moreover, it encourages your pores to close, which can help seal in the ink and contribute to a sharper-looking healed tattoo. Finally, pat the tattoo dry with a clean paper towel. Never rub; instead, gently lay the paper towel over the area to absorb moisture without irritating the skin.
Initial Moisturizing: A Thin Layer of Protection
Once your tattoo is completely dry, apply a very thin layer of Aquaphor. The key here is “thin” – you want to moisturize without suffocating the skin. Aquaphor provides a protective barrier and helps keep the area hydrated, aiding in the initial stages of healing. Remember, this moisturizing step with Aquaphor is typically reserved for the first day only, preparing the skin for the next phase of the tattoo aftercare process.
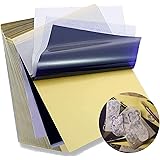
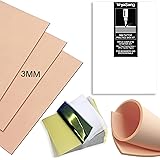
The Saniderm Advantage: Revolutionizing Your Tattoo Healing Process
Day two marks a significant shift in your tattoo healing routine, moving towards a much more low-maintenance approach. The morning after your tattoo, wash it again with unscented antibacterial soap, just as you did on day one. However, this time, you will not reapply Aquaphor. Instead, ensure your tattoo is absolutely bone dry; this is crucial for the successful application of the second skin.
Why Wait? Understanding the Weeping Phase
A common mistake many first-time Saniderm users make is applying it immediately after getting their tattoo. While second skin products like Saniderm are excellent for healing, direct application on day one can cause problems. A fresh tattoo will naturally “weep” — releasing plasma, blood, and excess ink. If applied too soon, all this fluid gets trapped beneath the Saniderm, leading to potential irritation, bubbling, or even infection.
By waiting until day two, you allow the initial weeping to subside. The first wash helps remove much of this fluid, and by then, the tattoo has calmed down significantly. This preparation ensures that when you apply Saniderm, it adheres cleanly to a less active surface, creating an ideal environment for healing tattoos with second skin.
Applying Saniderm for Flawless Coverage
Before application, always wash and thoroughly dry your hands. Ensure the tattooed area is also completely dry. When applying the Saniderm, aim for a smooth, flat surface without any air bubbles or wrinkles. It’s often helpful to cut the Saniderm to size, leaving a generous border of at least an inch around the tattoo. For larger pieces or difficult-to-reach areas, consider asking a trusted friend to help; clean hands are still a must for them.
The beauty of Saniderm is its ability to act as a literal second skin. Once applied correctly, it shields your tattoo from bacteria, friction, and even water, allowing you to shower and sleep without constant worry. This protective barrier promotes a moist healing environment, which is known to accelerate recovery and reduce scabbing.
You should leave the Saniderm on for no more than five days. Throughout this period, keep an eye on it to ensure it remains sealed. If the edges begin to peel or lift, compromising the seal, it’s generally best to remove it, clean the tattoo, and proceed with a traditional moisturizing routine.
Removing Second Skin and Ongoing Care
The removal of your second skin is a critical step where many people inadvertently damage their healing tattoo. Do not rip the Saniderm off quickly or directly upwards. This aggressive removal can pull off scabs and even extract ink, potentially ruining your tattoo’s appearance.
Instead, gently pull the Saniderm *downward*, parallel to your skin, slowly and steadily. You might find it easier to do this in a warm shower, as the water can help loosen the adhesive. Once the second skin is completely removed, wash your tattoo thoroughly with antibacterial soap and pat it dry with a clean paper towel.
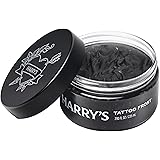
After removing the Saniderm, your tattoo may still experience some peeling. This is a normal part of the tattoo healing process. If peeling occurs, it’s essential to moisturize your tattoo frequently—typically three to five times a day. Use a high-quality, unscented tattoo moisturizer. While Aquaphor is excellent for the initial days, switching to a dedicated tattoo balm like Evolve Ink Tattoo Balm (as mentioned in the video) or another similar product is ideal for longer-term moisturizing.
Moisturizing keeps the skin supple, minimizes itchiness, and helps prevent excessive scabbing. Different areas of the body can react uniquely; some parts might peel more than others. Consistent moisturizing is key until all peeling has subsided and your skin feels smooth and healed.
Your Tattoo Healing Q&A: Setting the Record Straight
What is the very first thing I should do when I get home with a new tattoo?
Once home, you should promptly remove the initial protective wrap the artist put on and let your tattoo air out for about 30 minutes before washing it.
How should I wash my new tattoo for the first time?
Gently wash your hands, then wet the tattoo with lukewarm water and mild, unscented antibacterial soap. Rinse with cold water and pat it completely dry with a clean paper towel.
Should I moisturize my tattoo immediately after the first wash?
Yes, after drying, apply a very thin layer of Aquaphor to moisturize. This step is typically only for the first day to prepare your skin for further healing.
Can I apply Saniderm (second skin) right after getting my tattoo?
It’s best to wait until day two. A fresh tattoo will naturally “weep” plasma and ink, and applying Saniderm too soon can trap these fluids, causing irritation or bubbling.
How long should I keep Saniderm on my tattoo?
You should leave the Saniderm on for a maximum of five days. If the edges lift or the seal breaks before then, it’s best to remove it and switch to a traditional moisturizing routine.